If you drive a stick shift, the clutch is the heart of every gear change. A good clutch kit keeps the car smooth, the gearbox safe, and the driving fun. This guide walks you through picking the right kit, why a stage 2 upgrade matters, and how to fit it without a mess.
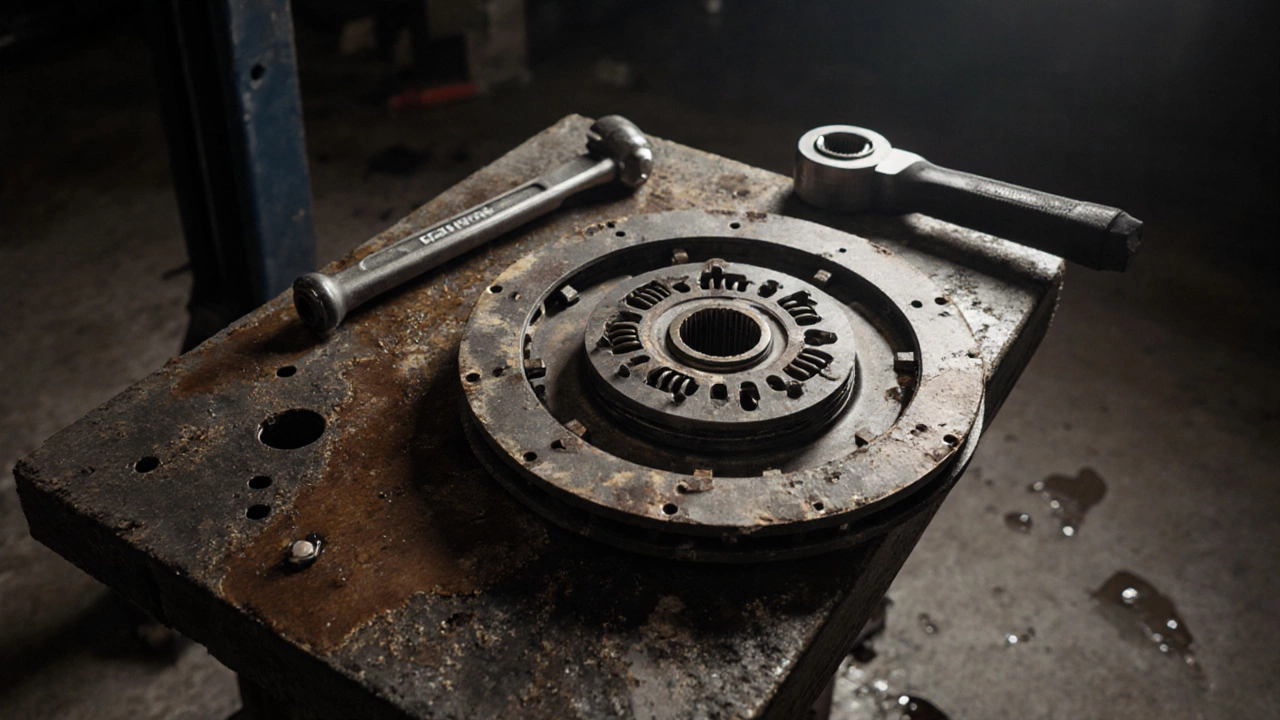
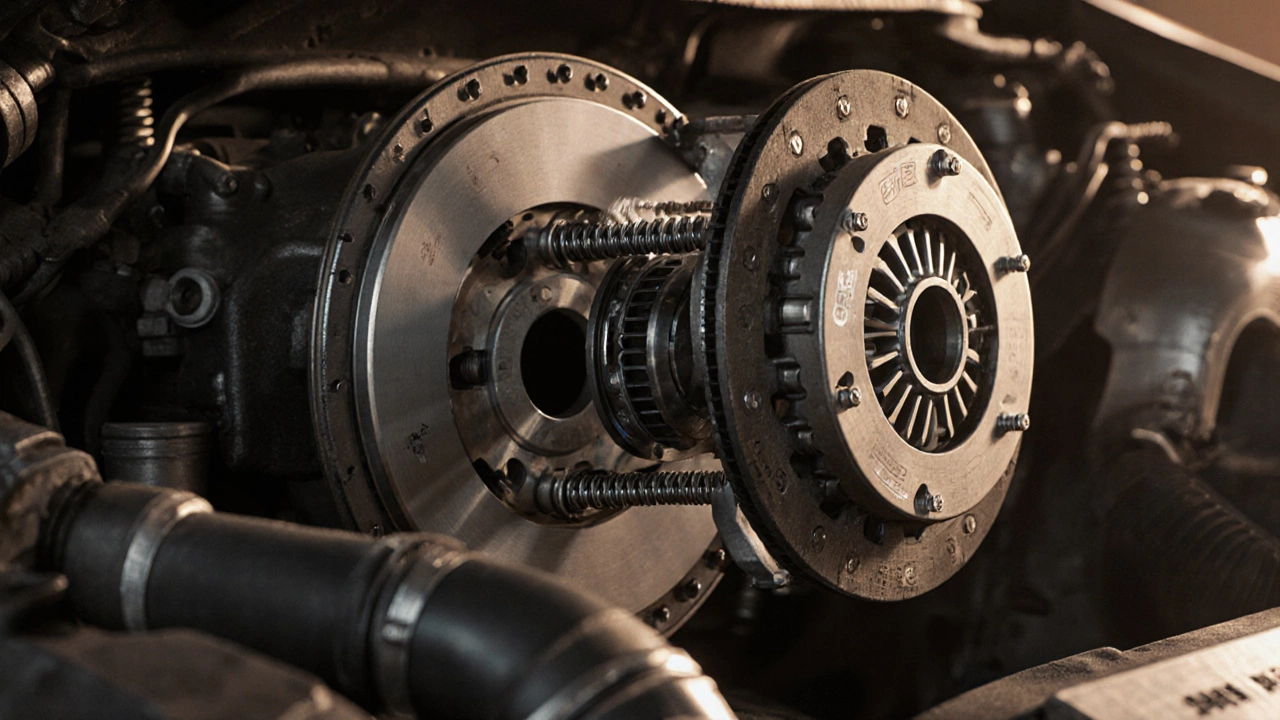
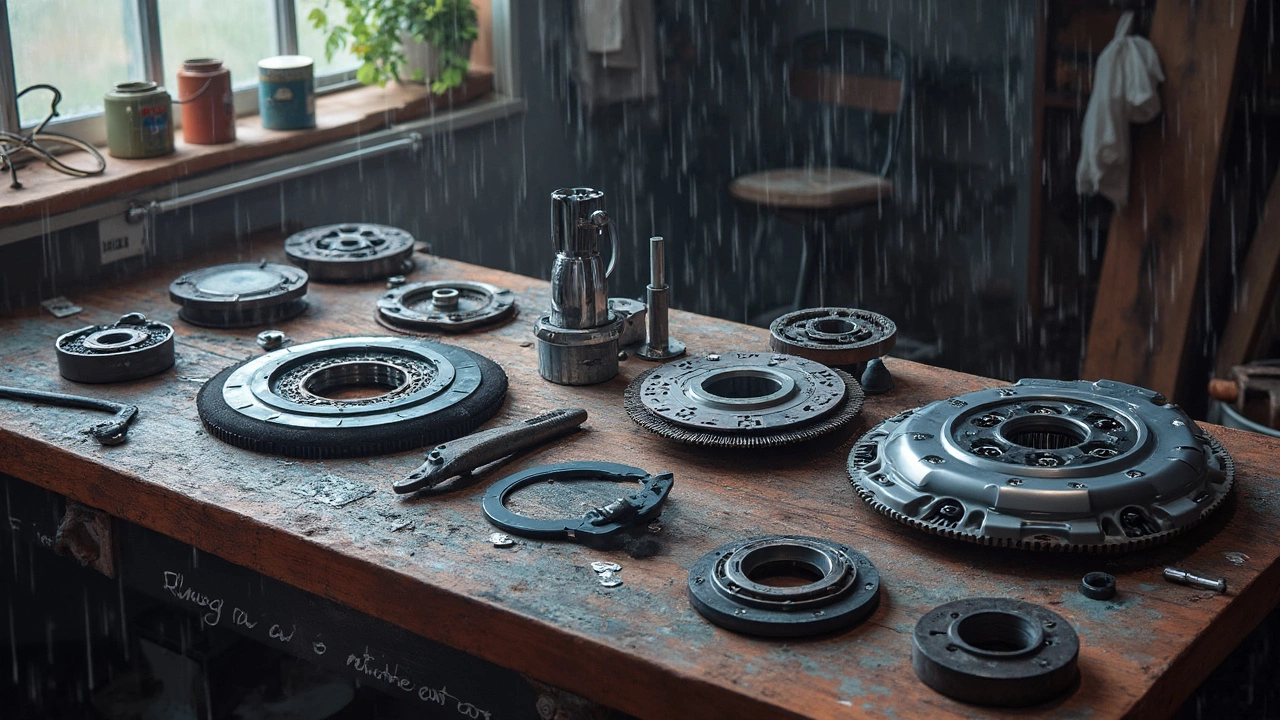
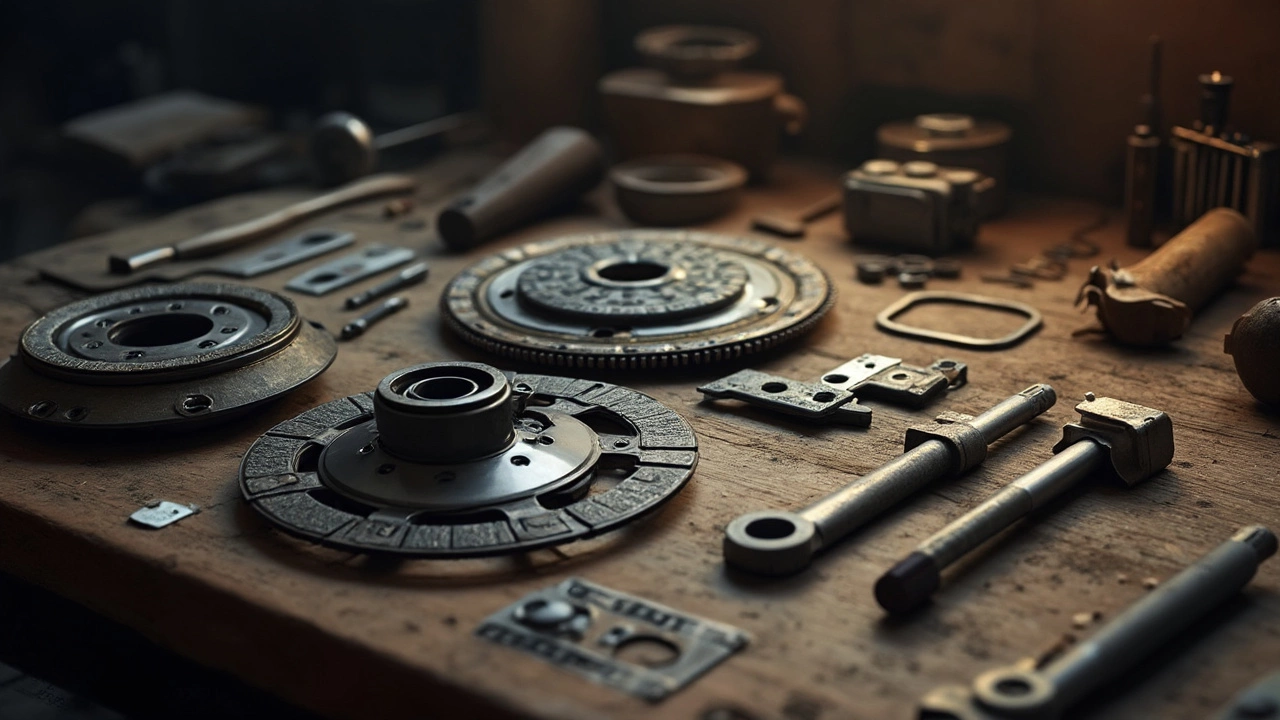
A standard clutch kit usually contains a pressure plate, a clutch disc, and a release bearing. Some kits add a pilot bearing, a throw‑out bearing, or a clutch alignment tool. All the parts work together: the disc transfers engine power, the pressure plate clamps it down, and the release bearing lets the pedal disengage the lock when you shift.
When you shop, check the torque rating, friction material, and whether the kit matches your vehicle’s make and model. OEM kits replicate the factory feel, while performance kits use ceramic or kevlar discs for higher grip. If you plan to race or tow heavy loads, a performance kit can prevent slipping.
A stage 2 clutch kit is the next step up from stock. It typically features a stronger pressure plate, a thicker friction disc, and upgraded bearings. The result is more torque capacity and a firmer pedal feel. You’ll notice quicker launches, less clutch slip, and a longer life under high‑load conditions.
Consider a stage 2 kit if you’ve added a turbo, increased horsepower, or frequently drive on steep hills. The extra grip keeps your gearbox from grinding, and the upgraded bearings handle higher temperatures. It’s still street‑legal, so you won’t lose daily drivability.
Before you buy, compare the clutch’s torque rating with your engine’s peak torque. A rule of thumb: the clutch should handle at least 1.3 times the engine’s max torque. That safety margin stops premature wear.
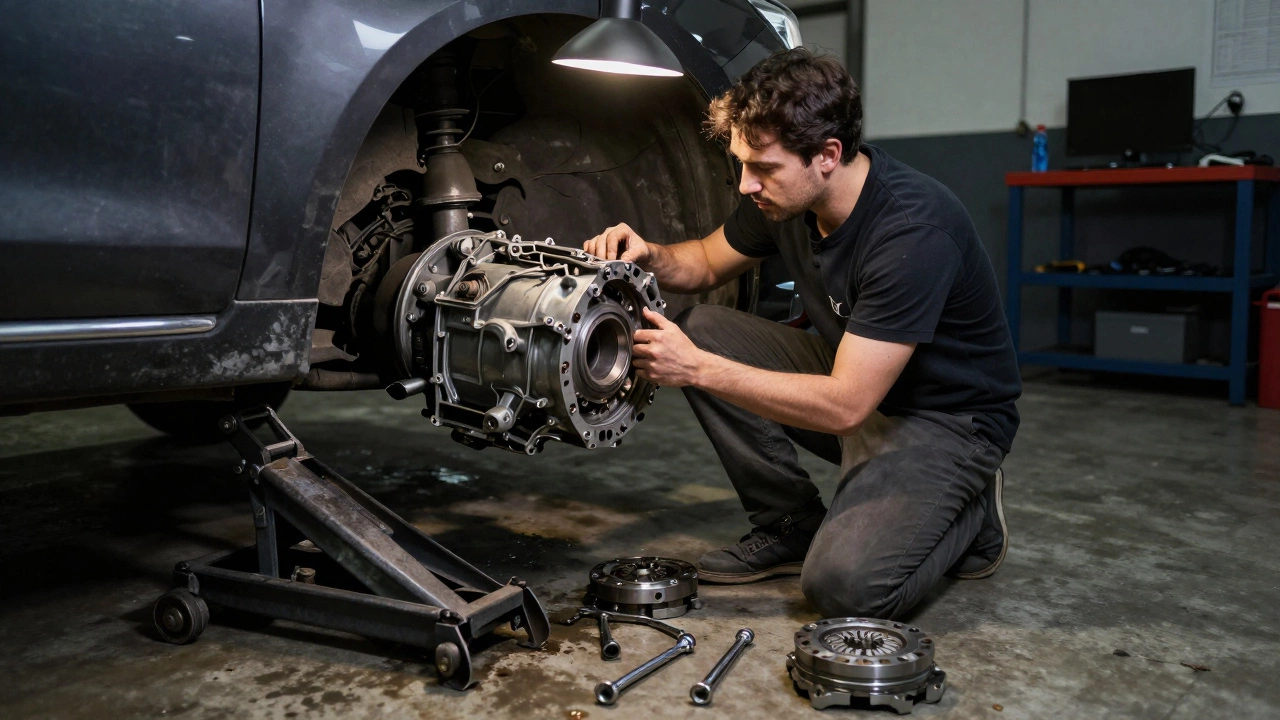
First, gather tools: a socket set, torque wrench, clutch alignment tool, and a sturdy jack. Disconnect the battery and raise the car safely on stands. Remove the transmission—this is the biggest chunk of work, but a friend can help hold it while you undo the bolts.
Once the transmission is out, spin the input shaft and mark the pilot bearing’s position. Take out the old pressure plate and disc, then clean the flywheel surface. If the flywheel is scored, have it machined or replace it.
Install the new pilot bearing, then place the new clutch disc on the flywheel using the alignment tool. Slip the new pressure plate over the disc, aligning the dowel pins. Tighten the pressure plate bolts in a criss‑cross pattern to the manufacturer’s torque spec—usually around 30 Nm, but double‑check your kit’s instructions.
Re‑install the transmission, making sure the input shaft lines up with the clutch disc. Re‑torque all bolts, reconnect the battery, and lower the car. Finally, press the clutch pedal a few times to seat the new disc.
If anything feels off—odd noises, slipping, or a spongy pedal—stop driving and double‑check the installation. Most issues come from mis‑aligned pins or a warped flywheel.
With the right kit and a careful install, your clutch will feel solid, respond quickly, and last longer. Keep an eye on wear plates and replace them at the first sign of uneven wear. A well‑maintained clutch kit saves money, protects the gearbox, and makes every shift enjoyable.
 25 December 2025
Replacing a clutch isn't easy-it's complex, time-consuming, and risky if done wrong. Learn what's really involved, when to DIY, and when to hire a pro to avoid costly mistakes.
 23 November 2025
Most clutches last 50,000 to 100,000 miles, but driving habits matter more than mileage. Learn the signs of wear, what's in a clutch kit, and how to avoid costly transmission damage.
 25 October 2025
Explore how a clutch kit impacts performance, durability, and driving feel. Learn types, when to upgrade, installation tips, and common pitfalls in 2025.
 15 July 2025
Discover realistic clutch replacement costs, what affects pricing, how to spot trouble early, and the best ways to stretch your money. Save on your next repair.
 9 July 2025
Get a real-world breakdown of labor costs for clutch kit replacement. Find out what affects the price, tips to save money, and what to expect in 2025 garages.
 13 May 2025
Ever wondered what’s actually bundled inside a clutch kit? This article breaks down each component, explains its job, and shares what to look out for before you buy. You’ll get tips for choosing the right kit, common signs of clutch wear, and guidance for a smoother DIY swap. Don’t risk getting stranded—know what goes into your clutch kit and why it matters. Maintenance just became a whole lot easier.
 27 April 2025
Wondering if your car needs a new clutch kit? This guide helps you spot real symptoms of clutch problems, explains why these issues happen, and gives clear next steps. You’ll learn about the main warning signs, driving habits that may kill your clutch faster, and tips for extending your clutch’s life. Gear up for honest insights on when a clutch replacement is worth it—and what to expect if you keep putting it off. No fluff, just real-life advice to save your wallet and your ride.
 12 April 2025
Replacing a clutch is more than just swapping out a worn component, it's an opportunity to ensure your car's reliability for the long haul. While you're in there, it's smart to consider replacing related parts to save on labor costs down the road. This can include the flywheel, clutch release bearing, and pilot bushing, among others. Knowing what to replace can save you future headaches and keep your vehicle running smoother, longer.
 4 April 2025
Ever wondered what's inside a complete clutch kit? Dive into the essential components that make your car's clutch system tick. Whether you're a DIY enthusiast or just curious about car maintenance, understanding these parts will help you grasp how your vehicle shifts gears smoothly. Get ready to explore the core elements like the clutch disc, pressure plate, release bearing, and more.
 8 March 2025
A worn-out clutch can dramatically affect your driving experience. Knowing when to replace your clutch kit can save you a lot of hassles down the road. This article provides crucial insights into the signs of a failing clutch and tips for timely replacement, ensuring smooth and safe driving.
 25 December 2024
Installing a clutch kit can be a rewarding yet challenging task for car enthusiasts and DIY mechanics alike. This guide aims to demystify the process by breaking down the steps involved, assessing the necessary tools, and providing insights into potential challenges. A well-installed clutch not only ensures smooth gear shifts but also prolongs the life of your car's manual transmission. With safety tips and expert advice, this article will walk you through what it takes to successfully replace a clutch kit on your own.


©2026 northwichtyrescentre.co.uk. All rights reserved
0