For those with a penchant for tinkering under the hood, installing a clutch kit can be the ultimate test of skill and patience. Unlike a quick oil change or a tire rotation, swapping out a clutch is a task that requires a solid understanding of your vehicle's mechanics and a fair share of elbow grease.
But fear not. Whether you're looking to breathe new life into an aging gearbox or simply trying to save a few bucks by avoiding the mechanic, tackling a clutch kit installation is within reach for the motivated individual. In this guide, we will embark on a journey through the nitty-gritty details of clutch replacement, equipping you with the knowledge and confidence to do it yourself.
- Understanding Your Clutch Kit
- Tools of the Trade
- Step-by-Step Installation Process
- Common Challenges and Solutions
- Ensuring Safety During Installation
- Testing and Troubleshooting
Understanding Your Clutch Kit
Grasping the intricacies of your clutch kit is paramount before diving into the mechanics of installation. A typical clutch kit generally includes a clutch disc, pressure plate, and a release bearing. Some advanced kits might pack additional components like a pilot bushing or an alignment tool. The clutch disc is the intermediary that connects the flywheel to the transmission, facilitating the smooth transfer of power. The pressure plate, on the other hand, applies the necessary pressure to engage and disengage the clutch disc with the flywheel. The release bearing, also known as the throw-out bearing, plays its part by allowing the clutch pedal to disengage the clutch plate from the flywheel.
Different clutch kits cater to varying needs, depending on the performance you expect from your vehicle. A standard clutch kit works well for everyday driving, delivering longevity and reliability. However, performance enthusiasts might opt for racing clutches made from ceramic or composite materials, designed to withstand higher temperatures and loads. When selecting a clutch kit, it's crucial to ensure compatibility with your car’s make, model, and engine type. Not all kits are universal, so sourcing the right one is a step you don't want to overlook.
For those constantly hitting the open roads or tackling heavy-duty work, understanding the differences in friction materials used in your clutch disc can offer significant insights. Organic clutch discs, compact with rubber or aramid fibers, provide a smoother engage compared to ceramic ones, which tend to exhibit more abrupt engagement, albeit being more durable. It might be worth taking advice from auto mechanics or looking up reviews for specific brands and products to ascertain the quality and service life of the kit you choose.
"Replacing a clutch isn't just about installing a new component. It reshapes the driving experience and prolongs your vehicle's performance," says John Reynolds, a seasoned auto mechanic with two decades of experience.
To aid in your understanding, here's a snapshot of the typical lifespan of different clutch materials:
| Material | Average Lifespan (miles) |
|---|---|
| Organic | 30,000 - 50,000 |
| Ceramic | 60,000 - 80,000 |
| Kevlar | 70,000 - 100,000 |
Delving into these elements and knowing what your car repair needs are, plays a crucial role in not only the smooth installation but also ensuring the longevity and efficiency of your vehicle's manual transmission. Opting for the right clutch set can drastically transform how your car handles day-to-day challenges, reinvigorating your driving experience while offering newfound confidence in your DIY mechanic skills.
Tools of the Trade
Embarking on the task of installing a new clutch kit requires more than just enthusiasm; it demands the right tools to get the job done efficiently and safely. The old adage goes, "A craftsman is only as good as his tools," and this couldn't be more true in the world of automotive repair. To start with, you'll need a quality set of basic hand tools, such as wrenches, sockets, and screwdrivers. While these might sound like common household items, investing in durable, automotive-grade tools can save you a mountain of headaches down the road.
Essential to the job is a set of jack stands and a hydraulic floor jack. The process of replacing a clutch involves working underneath your vehicle, so stability and safety should be your top priorities. Always make sure your car is securely lifted and supported before crawling under it, as this is an area where one cannot afford to cut corners. You may also find a transmission jack particularly handy. This specialized tool simplifies the removal and installation of your car’s transmission, making the task far less daunting than wrestling with it manually.
"Having the right tools for a clutch replacement is imperative," notes renowned mechanic Tom Diaz in a recent issue of Auto Repair Monthly. "Patience and precision don't matter much if you lack the right equipment to execute them."
Next on the checklist is a clutch alignment tool. Often included with your clutch kit, this tool is crucial for lining up the clutch disc with the pressure plate and flywheel. A good alignment is pivotal not only for smooth operation but also to avoid unnecessary wear and tear on your newly installed components. In addition to these, a torque wrench will come in handy to ensure all bolts are tightened to the manufacturer’s specifications, reducing the risk of future malfunctions.
Fluids are a less obvious but equally important part of your toolkit. You'll likely need to drain and replace transmission fluid, so having the right type and amount on hand is essential. A fluid funnel and a catch pan will also simplify this messy part of the job. Remember, attention to these details does more than just keep your garage clean—they contribute to the longevity and performance of your hard work. Equipping yourself with these specialized tools not only saves time but also ensures the job is done right, providing peace of mind as you take your first test drive post-installation.
Step-by-Step Installation Process
Installing a clutch kit is no small feat and requires a methodical approach to ensure every component is correctly positioned and securely fastened. This process can vary slightly depending on your vehicle's make and model, but the fundamental steps remain the same. Patience and attention to detail are your best allies as you navigate through this intricate task.
1. Preparing Your Workspace
Your first task is setting up a conducive workspace. Ensure your vehicle is parked on a flat surface, and use jack stands to keep it elevated and secure. Safety is paramount, so double-check all supports before proceeding. Gather all necessary tools, including wrenches, screwdrivers, and a torque wrench, within arm's reach. Organization can significantly streamline the process and reduce the chances of losing or misplacing important components.
2. Removing the Transmission
The next step involves the removal of the transmission, which can be daunting. Begin by disconnecting the battery to prevent accidental electric shocks. Remove any components obstructing access to the transmission, such as exhaust parts or drive shafts. Once you have clear access, carefully unbolt the transmission from the engine block. This is a heavy and cumbersome piece, so assistance may be necessary. Lower it gently to avoid damage.
According to Haynes Manuals, "Taking your time to carefully lower and slide out the transmission can prevent costly damages."
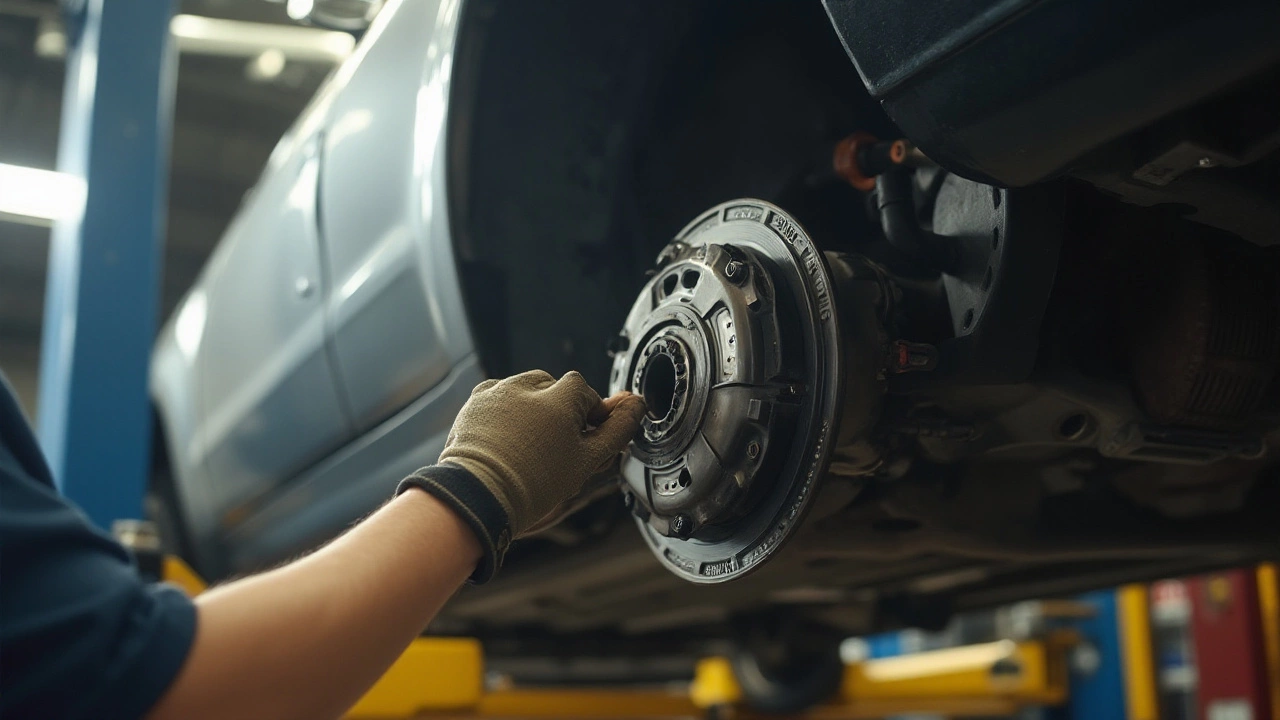
3. Detaching the Old Clutch
With the transmission out, you can now access the clutch kit. Remove the bolts securing the pressure plate, and gently pry it away to expose the clutch disc. Pay attention to any signs of wear or damage on the old clutch; this can provide insights into any underlying issues. Once removed, clean the flywheel surface thoroughly to ensure optimal contact with the new clutch disc.
4. Installing the New Clutch Kit
Now comes the gratifying part—installing your new clutch kit. Align the new clutch plate with the flywheel, using a clutch alignment tool for precision. Attach the pressure plate over the disc, ensuring all bolts are tightened in a crisscross pattern to evenly distribute pressure. It's imperative to use a torque wrench to apply manufacturer-specified torque settings to prevent warping the components.
5. Reassembling and Testing
Once the clutch is securely in place, it's time to refit the transmission. Again, this step may require assistance due to the weight and positioning needed. Carefully align it with the engine and secure it with bolts. Reattach any components previously removed, including the battery. Finally, test the clutch pedal for smooth operation and observe any unusual noises during a test drive. Any irregularities might suggest the need to retrace some steps.
This thorough, step-by-step guide should empower you to tackle a clutch installation with confidence. Remember, precision and patience are key, and don't hesitate to consult a professional if you're unsure about any part of the process. With practice, this task becomes a valuable skill that enhances both your vehicle's performance and your mechanical prowess.
Common Challenges and Solutions
Replacing a clutch kit is no small feat, and even the most seasoned mechanics will encounter hurdles along the way. The first challenge that often pops up is the sheer weight and complexity of the transmission system. Many DIYers underestimate how heavy the transmission can be, which complicates its removal and reinstallation. It's essential to have the right support, like a transmission jack, to prevent injury and damage. Ensuring the car is securely elevated on jack stands is crucial to maintaining safety throughout the process. Getting the old clutch out is often a battle of perseverance, elbow grease, and just the right amount of strategic bashing. When replacing the clutch, precision is key. Misalignment can lead to shuddering or even the failure of the newly installed unit.
Once you've managed the physical aspects, the adversarial job of aligning the new clutch kit takes center stage. A common misstep happens during the alignment, where an improperly seated clutch plate can prohibit the gearbox from sliding smoothly back into place. Tools like the alignment tool included in most kits are invaluable. Patience is paramount, and sometimes stepping away for a fresh perspective works wonders. Professionals often stress the need for thoroughness. As the renowned mechanic Tom Magliozzi once quipped,
"The hardest part about fixing a car isn’t the work; it’s understanding what you’re doing and sticking with it till you're done."
Aside from alignment, another challenge is dealing with stubborn bolts and rusted components, especially in older cars. These seem to have a mind of their own, either resisting with fierce determination or snapping under pressure. Here, penetrating oil and a good-quality breaker bar can become your best friends. Knowing when to apply gentle heat to components to aid in removal can also make the difference between a smooth operation and a frustrating ordeal. If a bolt is seized, patience and incremental efforts in loosening rather than brute force usually yield better results. Diving into clutch hydraulics, bleeding the hydraulic line after installation is vital to ensuring proper clutch function. A missed air bubble can be the culprit behind a squishy pedal feel, leading to potential travel issues in the clutch pedal. Take the time to bleed the lines thoroughly, sometimes needing more than one pass to ensure all the air is out.
After overcoming these hurdles, testing the new clutch can bring a whole new set of annoyances. The first sign of trouble often appears during the test drive when shifts don't feel right or the pedal feels odd. This can often be traced back to mechanical oversight during installation, like a misaligned pressure plate or incomplete torque specs on bolts. Keeping a printed or digital copy of the vehicle's repair manual or specific clutch installation instructions handy can streamline pinpointing where things might have gone wrong. Regularly, it’s advisable to get a second pair of eyes to examine the job, whether it’s an experienced friend or a professional, if problems persist post-installation. Such collaboration usually offers insights you might have overlooked in the throes of the hands-on task.
Ensuring Safety During Installation
When it comes to installing a clutch kit, safety should always be your top priority. The process involves not just skill, but also a significant amount of physical labor and interaction with potentially dangerous tools. Before turning the ignition off and getting under your vehicle, equip yourself with the right knowledge and practices to ensure that your DIY project does not end in injury. One crucial step is to make sure your car is parked on a flat, stable surface and is well-supported with quality jack stands. Never rely solely on a hydraulic jack, as it can fail unexpectedly, posing a risk to your life.
Wearing the appropriate protective gear is another essential component of a safe installation process. Gloves will protect your hands from sharp components and burns caused by hot surfaces, while safety goggles shield your eyes from flying debris and potential fluid spills. It’s always a smart choice to wear steel-toed boots to protect your feet in the event of dropped tools or parts. Remember, the underside of a car is an unforgiving place with sharp edges and heavy components.
One seasoned mechanic reportedly emphasized, "Safety is the most overlooked tool in your toolkit. People get so focused on the task at hand that they forget the dangers lurking around."Organizing your tools and workspace before you begin can also reduce the likelihood of accidents. An orderly setup where all your tools are within arm’s reach eliminates the need for dangerous contortions or hasty movements. It’s highly advisable to have a fire extinguisher nearby, and ensure your workspace is well-ventilated, as working with cars often involves exposure to flammable liquids and noxious fumes.
Prior to removing the old clutch, disconnect the vehicle's battery to prevent any electrical mishaps. This step is crucial, as even a minor electric shock can cause you to jerk violently, potentially leading to an injury. Consult your vehicle’s manual for specific disconnection procedures if you’re unsure. If this all seems a bit daunting, consider setting realistic limits for yourself and knowing when to seek professional aid. While the challenge is exciting, safety is non-negotiable.
Safety Equipment Checklist
- Car lift or sturdy jack stands
- Protective gloves
- Safety goggles
- Steel-toed boots
- Fire extinguisher
- First aid kit
Following these guidelines and making sure you’re prepared will not only keep you safe but also make the job much smoother and more enjoyable. Keep these practices in mind, and your clutch kit installation will be the rewarding experience it should be, allowing you to shift gears safely and confidently once your car is back on the road.
Testing and Troubleshooting
After putting in the hard work to install your new clutch kit, it’s crucial to ensure everything is functioning as it should. Testing is the first step to confirm that the installation was successful. Begin by starting the vehicle and letting it idle for a few moments to listen for any unusual noises that might indicate improper installation. Once everything sounds normal, engage the clutch to check pedal pressure. If the pedal feels too stiff or too loose, adjustments might be necessary. Testing the engagement point is next—this is where the clutch begins to transmit the engine's power to the transmission. A typical engagement point is about an inch or two from the top of the pedal travel.
When road testing, drive at different speeds and attempt gear shifts to ensure the transmission engages smoothly without slipping or grinding noises. Careful attention should be given to how the vehicle accelerates, as this can indicate if the clutch is gripping correctly. If you notice any issues, such as a burning smell or shuddering, these are signs of potential problems that need addressing.
Renowned auto mechanic Tom Magliozzi of 'Car Talk' once mentioned the importance of a proper break-in period for clutches, stating, "A new clutch assembly needs a careful break-in, usually about 500 miles, to seat properly." Such insights highlight the importance of not rushing this phase.Possible adjustments include checking the linkage and ensuring the hydraulic system is without air pockets. It's important to periodically re-evaluate the setup during this initial period to make sure everything settles in correctly.
Even with the most thorough install, troubleshooting might be required to fine-tune your new kit. Common issues stem from misalignment or improper torque on the flywheel bolts. Verify the torque settings against the manufacturer's specifications, and if any discrepancies are found, rectify them immediately to prevent premature wear. Another aspect to consider is the throw-out bearing; if it wasn’t replaced or installed correctly, odd noises or vibrations can occur. Additionally, a worn clutch fork may not appear as an immediate suspect but can cause a host of troubles. To troubleshoot effectively, approach the problem methodically, often beginning with the simplest potential solution and methodically ruling out issues. If problems persist despite all measured precautions, it may be wise to consult with a professional who can provide further insights and possibly identify over-looked elements of the process that could have been missed.
In cases where adjustments are needed, having a clutch kit installation guide handy can be invaluable. Another tool at your disposal is the internet; forums and automotive communities are rich with shared experiences and solutions from individuals who have faced similar challenges. Remember, while installing a clutch involves a steep learning curve, refining the process through testing and troubleshooting is where the project hones its underlying value.