So, you're facing a radiator replacement? It might sound like a big deal, but trust me, it’s manageable if you’ve got some basic car repair skills. Radiators, those unsung heroes of your car’s cooling system, keep your engine from overheating by dispersing heat. When they fail, your engine's well-being is at stake. So, better tackle the issue sooner rather than later, right?
First off, knowing what you're up against is crucial. Radiator replacement isn’t a walk in the park, but with the right preparation, you’ll save some bucks and learn a thing or two about your car. You’re going to disconnect hoses, remove the old radiator, and pop in a new one. Sounds simple? It can be! Just ensure you have all the necessary tools on hand—you don't want to be elbow-deep in a car, cursing your lack of a wrench.
Understanding the Job
So, what exactly is involved in a radiator replacement? It's not magic, but you do need to know a few things before diving in. A car's radiator is crucial in keeping the engine at the right temperature. This means if your radiator isn't working, you run the risk of overheating, which is never fun.
Signs Your Radiator Needs Replacing
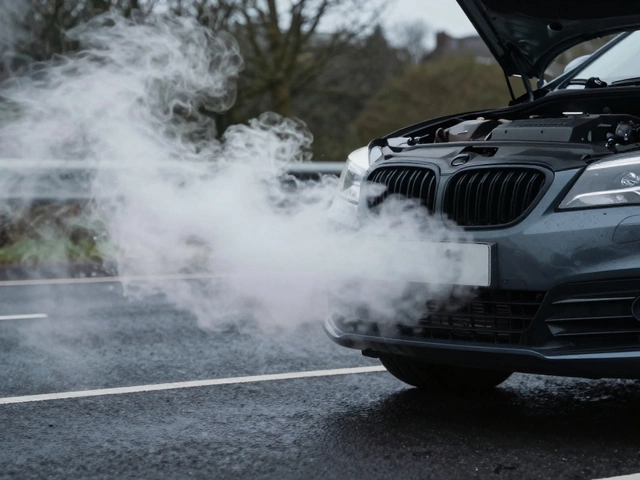
First, let's talk about when you might need to replace it. Common signs include your car running hotter than usual, leaking coolant (those colorful puddles under your car might be more than just random drips), or visible damage to the radiator itself, like corrosion or cracks. If these red flags pop up, it might be time to roll up your sleeves.
What’s Involved in Replacement?
Now, onto the nuts and bolts of replacement. The job usually involves removing the old radiator, which means you’ll need to safely drain the existing coolant first. Watch out for this step—coolant isn't exactly what you want all over your driveway.
- Disconnect the negative battery cable. Safety first, right?
- Drain the coolant.
- Remove the radiator's top and bottom hoses.
- Detach any additional components like fans or mounts.
- Lug out the old radiator (carefully).
- Install the new radiator and reconnect everything.
- Refill with coolant and purge air from the cooling system.
Does this sound like a tall order? Sure, there's a bit to learn, but once you're at it, things can become pretty logical.
Radiator Replacement Stats
Got a curiosity for numbers? Here's a quick look at radiator costs to give you an idea of what you might save by doing it yourself:
| Expense Type | Cost Range |
|---|---|
| DIY Radiator Cost | $100 - $300 |
| Professional Replacement | $500 - $1,000 |
Tackling the job yourself might save you a significant amount, but remember, it also comes with some responsibility.
Tools You’ll Need
Before you roll up your sleeves and dive into replacing that car radiator, make sure you’re equipped with the right tools for the job. Having everything laid out saves you from frustration later on. So, let's get your toolbox ready for some action!
Basic Hand Tools
First up, you’ll need a few reliable hand tools. Check for:
- Wrench Set: A complete set will cover various bolt sizes you'll encounter.
- Screwdrivers: Both flathead and Phillips to tackle different screws.
- Pliers: Regular pliers and needle nose pliers for precise work.
Specialty Tools
Apart from the basics, some specific tools can make radiator removal a breeze:
- Radiator Hose Removal Tool: Makes disconnecting hoses less tricky.
- Drain Pan: To catch coolant when you drain the old radiator.
- Torque Wrench: Ensures you tighten bolts to the manufacturer’s specification, which is key when dealing with your radiator replacement.
Safety Gear
Never compromise on safety. Equip yourself with:
- Safety Goggles: Protects you from splashes and debris.
- Gloves: To grip tools safely and protect your hands from sharp edges.
Coolant Testing Tools
To ensure your system is running optimally, consider:
- Coolant Tester: Handy to check the freezing and boiling point of your coolant mix.
Before we wrap up, having some old cardboard to lie on can make undercar adventures a tad more comfortable. And remember, a cool head is as vital as any tool when doing DIY fixes!
| Tool Name | Function |
|---|---|
| Wrench Set | Loosens and tightens nuts/bolts |
| Radiator Hose Tool | Facilitates hose removal |
| Torque Wrench | Ensures proper bolt tension |
| Safety Goggles | Protects eyes |
Common Mistakes
Tackling a radiator replacement job can be smooth sailing if you steer clear of some common pitfalls. Here’s a close look at the mistakes you shouldn't make.
Skipping the Flush
One rookie mistake is forgetting to flush the cooling system before installing a new car radiator. A flush ensures no residue or corrosion remains in the system that could harm the new radiator. Think of it like cleaning up a mess before inviting a guest—super important!
Overlooking hose condition
While focusing on your big, shiny new radiator, don’t ignore the hoses. Worn-out hoses can undercut your efforts, causing leaks and overheating. Check them thoroughly for wear and replace any that are dodgy.
Using the Wrong Coolant
Coolant isn't a one-size-fits-all deal. Different engines need different types. Using the wrong coolant can nullify all your hard work and end up eating into your radiator. Always check your car's specs and use the right type.
Incorrect Installation
Picture this: You’ve done the hard work, only to have loose connections. Make sure all bolts, hoses, and clamps are snug and secure. Take an extra five minutes to double-check everything. It's worth it.
Neglecting Air Pockets
A little detail that's often overlooked is burping the cooling system. Air pockets can trap in the lines and cause overheating. So run the engine after installation to let the air escape.
Here’s a quick recap of what to avoid:
- Forget to flush the system.
- Ignore hose condition.
- Use incorrect coolant.
- Install parts incorrectly.
- Leave air pockets in the system.
A surprising 39% of DIYers admit to at least one of these missteps during their first attempt. Knowing these common traps helps ensure your radiator replacement is a success, keeping your ride cool and you stress-free!
Tips for Success
Diving into a radiator replacement can be tricky, but these tips will help you nail it. The goal is to avoid frustration and unnecessary mistakes, so let's get right to it.
Prepare All the Right Tools
Before you even think about popping the hood, make sure you've got everything you need. You don’t want to sprint to the store mid-job. Pack your tool kit with wrenches, pliers, and a drain pan. Need a checklist? Here you go:
- Socket set and wrench
- Pliers
- Bucket or drain pan
- New coolant
- Replacement hoses, if needed
Having these things at arm’s reach will make the whole process smoother.
Addressing and Cleaning Connection Points
When you’re in the groove, rushing through the job can cause missed connections or worse. Clean the area around where the radiator sits—dust and grime don’t make good mechanics. Remember, when reconnecting hoses, they need to be tightly secured to avoid any leaks.
Take Your Time
Though it might be tempting to speed through, patience plays a crucial part in avoiding headaches later on. When you’re removing the old car radiator, take notes (mental or on paper)—it helps to retrace steps if needed.
Inspect Your New Radiator
Seems obvious, but before fitting a new radiator, give it a once-over for any manufacturing defects. The last thing you want is to complete the job and discover an unpleasant surprise.
Coolant Matters
Once installed, it’s time to add fresh coolant. Be sure you’ve got the right mix—it varies by car make and model. Double-check your manual if you’re unsure.
Break-in Period
After fitting everything back into place, give your car a test run. Monitor the temperature gauge for any signs of overheating. A test drive around the block can spot issues before they become disasters.
These real-world tips should set you up for success. Armed with knowledge and a bit of courage, you can tackle a radiator replacement like a pro!